
After the long wait, the so-called unhackable drive (lite-on) is now hacked and running backups. Thanks goes out to C4E and Team Jungle for their efforts on this project.
No one at Robinhoodsplayground.com is responsible if something bad happens if you follow this guide.
Sorry for the first few pictures being kind of crappy. They will be replaced as soon as I can get my real digital camera and then replace them.
What I'm going to try and show you here is how to extract they drive key and ID strings from the drive and then flash the drive. There are a few things that are required to do this. Here is a list of what you'll need.
1. A compatible SATA controller.
2. Some sort of Serial TTL or USB to Serial TTL like a CK3 lite or pro or Maximus's tool will work too. I'll be using a CK3 in this guide.
3. PortIO32 must be installed. This usually comes with the CK3 Tool download and Maximus's tool download as well. It also comes in the ixtreme 1.5 download.
4. .Net 2.0 or later.
5. The ixtreme 1.5 release.
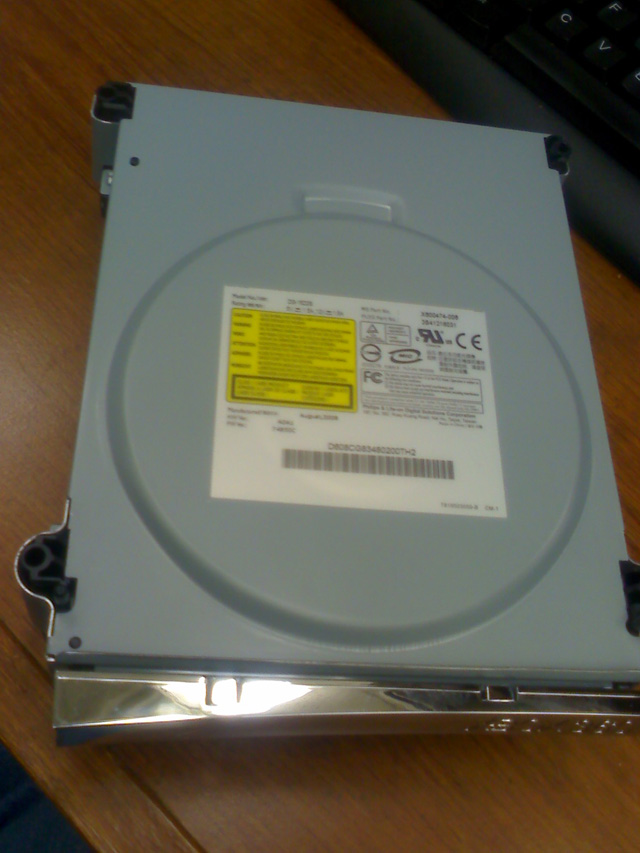
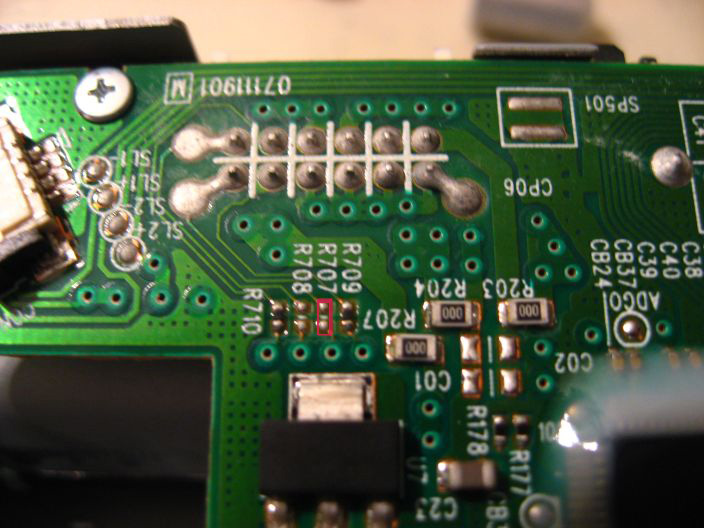
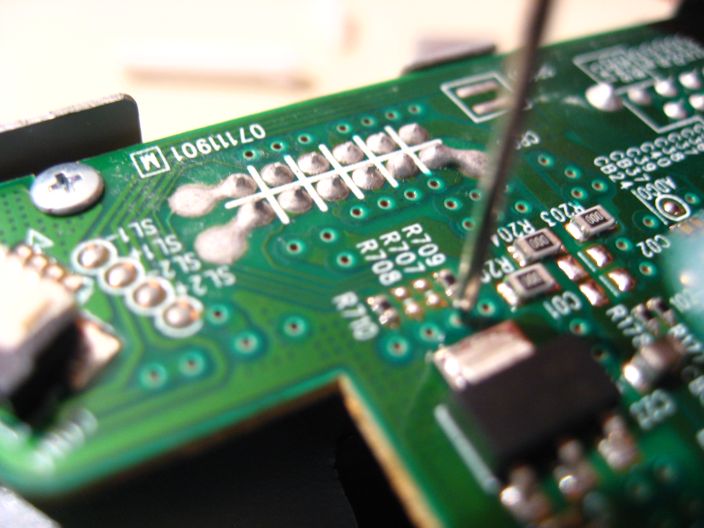
If you've got all the necessary stuff, we're ready to continue. You'll need to take your 360 apart and take the DVD drive out of it. Once you get the drive out of it, you will need to take the bottom cover off so remove the four (4) screws that holds the covers on and remove the bottom plate. That will expose the circuit board of the drive. There is a point that will need to be reconnected in order to retrieve the key. If your looking at the circuit board with the power and sata ports at the bottom, the place your looking for is in the bottom right corner near where the ribbon cable connects. You'll see a small resistor two places where is looks like something should be but is missing, and then another resistor. One of those spots where it looks like something is missing is what you need to reconnect. Specifically the one labeled R707. That is the TX or transmit line of the DVD drive.
That will need to be connected in order to get the key and ID strings. There are a couple few ways to do this. Solder it, I don't prefer this method, use a probe or spear for the CK3 or Maximus Extractor, or you can use a small flat head jewelers screw driver to hold the connection while the key is extracted.
This is what I do for the time being until I get my CK3 probe. If you have a probe or spear, then insert the tip into the hole (VIA) in front of where it's labeled R707 (but not yet, just letting you know where it goes when it's time). See the pic below for a better view of how to find the correct point.
Here is a picture of where to insert a probe or spear if you have one.
Now that you've located the TX and know how your going to connect it, turn on the drive and fire up CK Tool. Make sure you have the latest version so you can use the timer. You'll see how handy that is in a moment or two. Once CK Tool is running you'll have to do some configuration. On the general tab, install all the drivers if you haven't already.
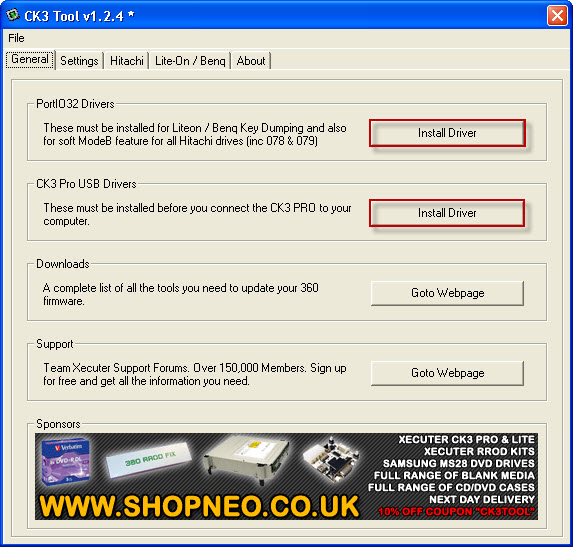
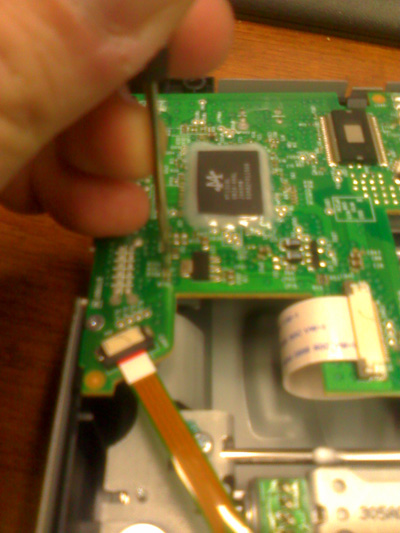
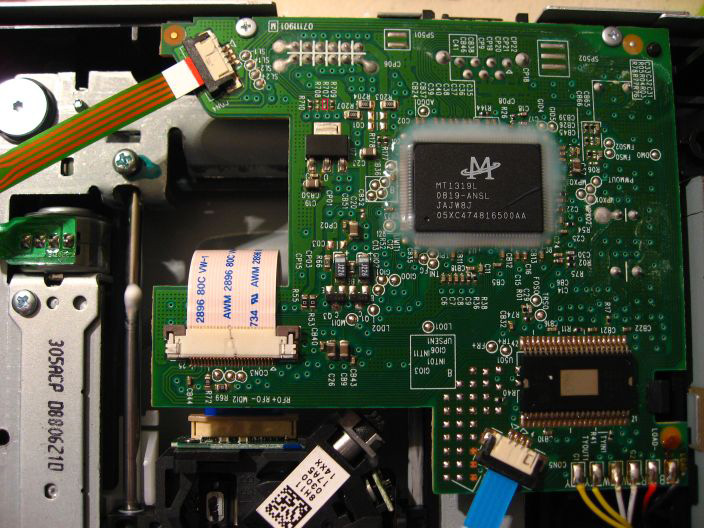
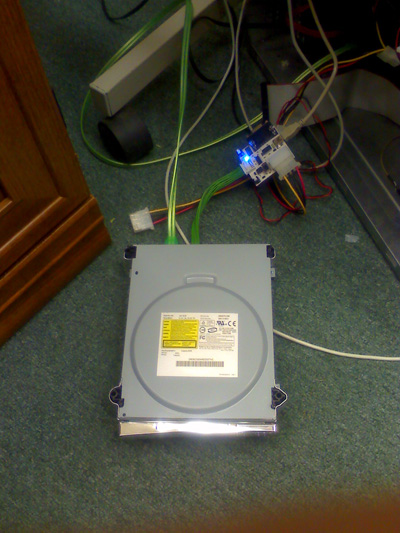
Do this before you connect your CK3 to your computer. After installing the drivers, reboot if you have to. Then connect your CK3 and let it install the drivers and things when it finds the CK3. Molex connector for power, USB cable for serial connection and power cable goes to the DVD drive. Here is a pic of the drive connected up to the CK3 Pro.
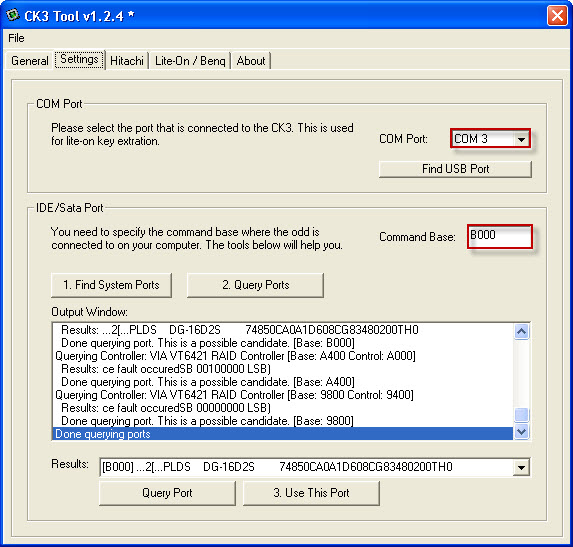
Make sure the CK3 is turned off by the switch and connect up your lite-on. Now turn on the CK3 back on. Then run the CK3 Tool again. This time, click on to the settings tab and click Find USB port. It will do a quick scan of everything thats connected via USB and find the CK3 and it should list the COM that the CK3 was installed on. Down at the bottom, Click Find System Ports. It should return a fair list of ports. Now click on Query Ports. In the Output window, You'll see the output from the query. When it's done with the query, click the drop down triangle on the bottom right and you'll see a list of possible ports there, select the one that's listed with the words PLDS DG-16D2S and then click Use this Port. Look again at the settings and make sure that the COM matched where the CK3 is installed and that the Command Base port number is proper.
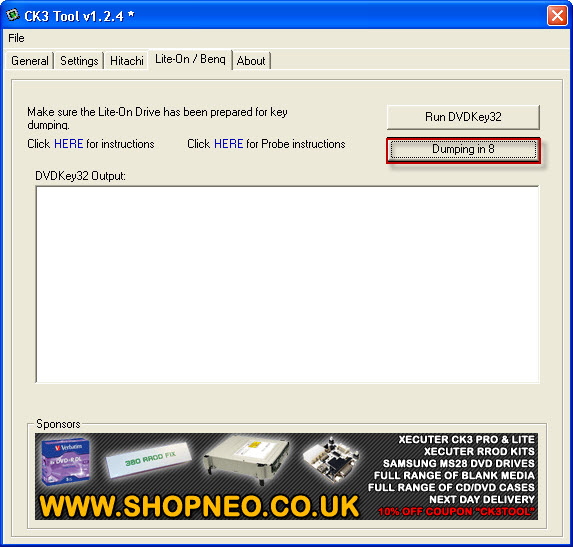
Now, this is where things get a little tricky, depending on how your going to reconnect R707. If you soldered it, you won't have to worry too much, but if your using a probe, spear or homemade device, that won't be too hard either. But if your going to use a small screw driver like I do, it can get a little nervey. But here we go. Turn the power on to the drive. Eject the drive and then turn it off. Push the tray about half way in by hand. You might have to play with this, some like to be a little further in than others do. Then turn the drive back on. Click on the Lite-On/Benq tab. If your using a probe, there is a small hole in front of where it's labeled R707. This is where the tip of the probe goes. You might have to scrape a little of the green lacquer off to get a good connection. If your using a small screwdriver, you want to bridge the connection between the two solder points for R707, you could use conductive ink pen to complete the circuit as well. If you soldered it, or used conductive ink, you won't have to worry about using the timer. Just click Run DVDKey32 and the magic should happen. If you get a bunch of C's in the output window, just turn everything off and start over. Now if your using a probe or screw driver to make the connection, this is where the timer comes into play. It's kinda of hard to hold a probe or screwdriver and click buttons at the same time, so if you click the Start CK3 Probe Timer, you'll have 10 seconds to complete the R707 connection.
You might want to practice this a couple times before actually running it to make sure that your comfortable with it. If your using a screwdriver, be aware that it can slip and if it hits something with current on it, it could fry your drive. Once you start your timer, make your connection and let CK3 Tool work. Once you get a complete message, your done with this part, you can close CK3 tool. You'll have 3 files in the directory where the CK3 tool executable is located. You should have key.bin, inquiry.bin and identity.bin. Open these files in a hex editor to verify their validity. You will want to back those up as well. You may even want to dump then a few more times and compare them to make sure your getting consistent information. Once you've verified everything, your ready to flash.
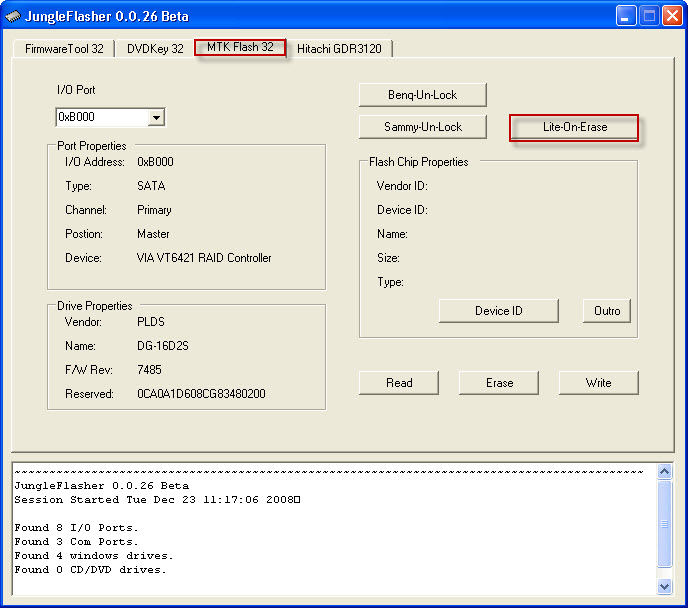
To flash with, you'll use a program called jungleflasher. This is the new all in one app to flash drives with. It comes with a warning to owners of sata controllers with the VIA chipset that it could lock your PC up if it polls the drive after flashing. If this happened to you, just use the DOS flashing instructions instead of trying it through windows. Once you open jungleflasher, click on the MTK Flash 32 tab, then click the Lite-On Erase button.
A warning screen will pop up.
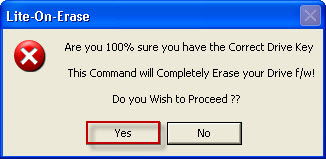
Click Yes if your sure you want to do this. A second warning screen will pop up, if you are really sure you want to do this, click yes again.
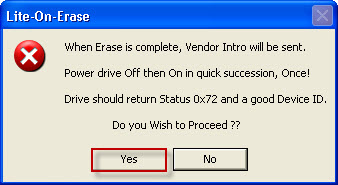
This will send the erase command to the drive, but it has to be in a 0x72 state. So you'll have to power cycle the drive pretty quickly to do this. Once the command has been sent, click on the Firmware Tool 32 tab. Click the Load from dump Files.

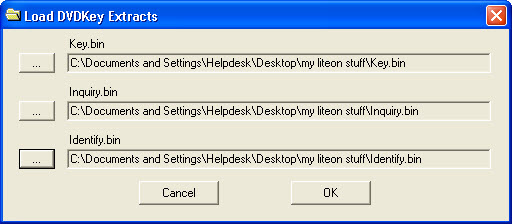
On the box that pops up, you'll need to populate this with your key, inquiry and identity bin files.
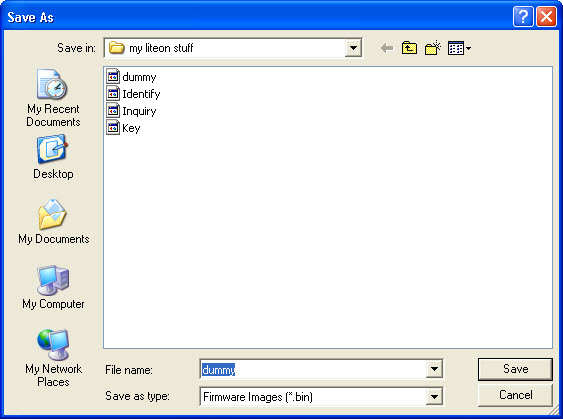
Then click ok. This will prompt you to save a dummy.bin file. Make sure to save this with your key, identity and inquiry bin files.
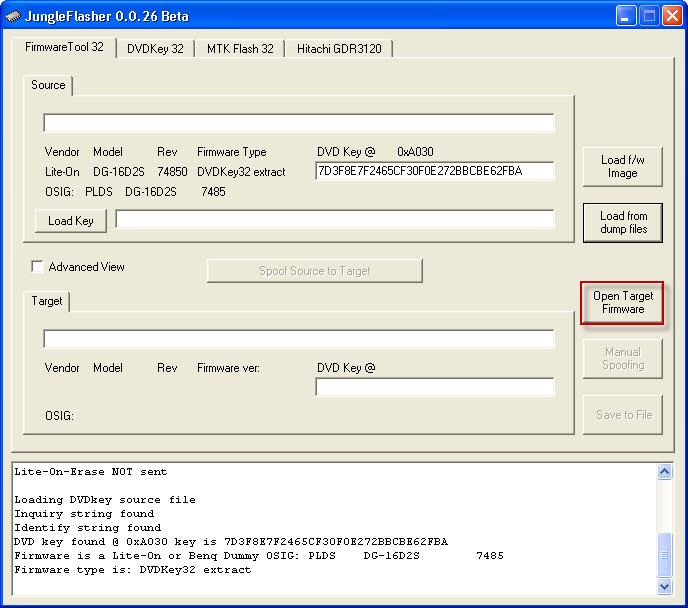
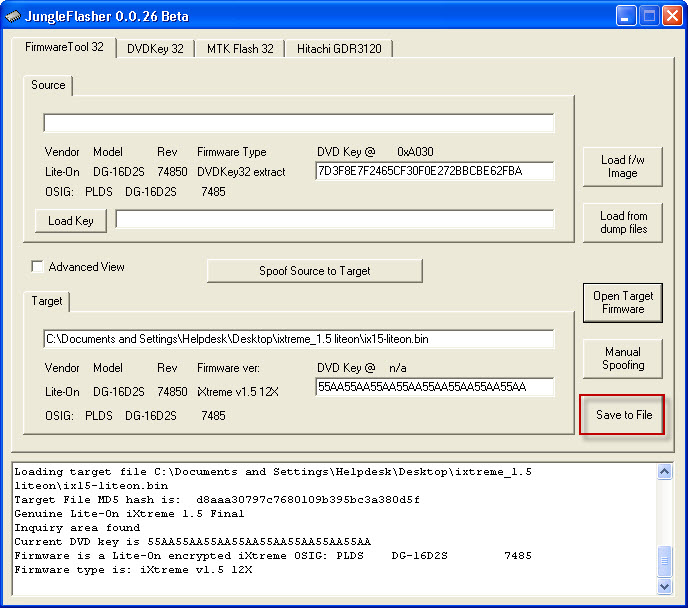
Now click Open Target Firmware and select the ixtreme 1.5 for lite-on file.
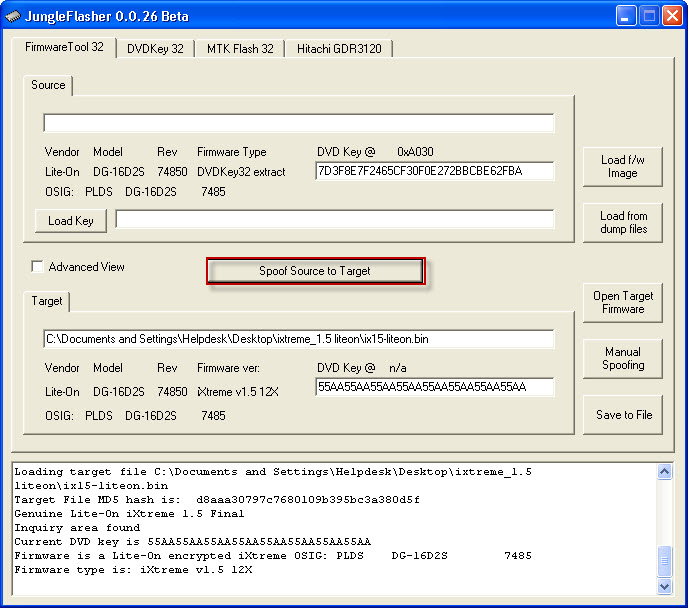
Now click the Spoof Source to Target button.
Now click Save to file and save it with the rest of your bin files.
Now click back onto the MTK Flash32 tab. It should have the file that you saved open and ready to flash so click the write button.
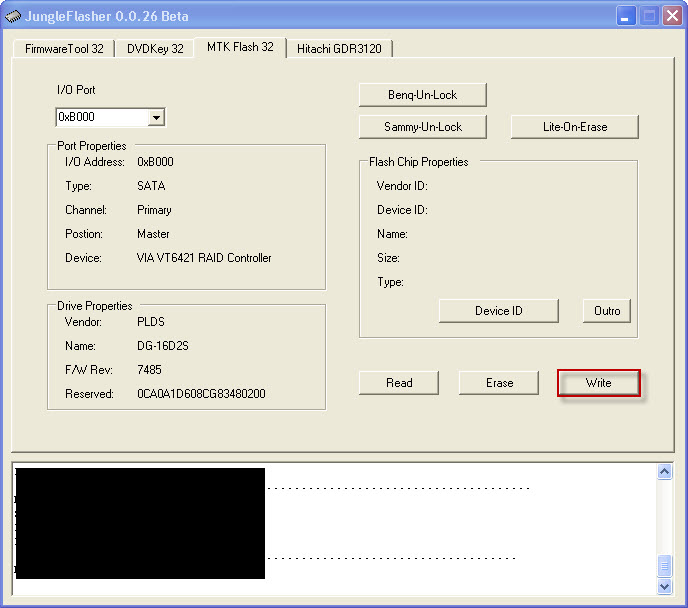
Jungleflasher will do it's thing and list its progress in the white area. Once flashing is complete, it will verify the flash and let you know if it was successful. If it fails verification, then it is recommended to use the DOS version of the flashing routine. When you exit from jungleflasher it will prompt to save a log file. If you got a good verify, congrats, now go try that thing out.